Find Typical Online Buyers With Facebook Pixel
The first piece of data that we need is people who purchase online regularly.
How in the heck are we going to get that list of people?
Well, we actually cannot get that list of people, but we can borrow Facebook’s data to target those people.
Facebook knows how people behave online. They know who has made purchases on which sites. So, if you let them know that the main objective of your ad is to get online orders, then they will prioritize showing your ad to people who typically buy online.
In order to let Facebook know that your objective is to get online orders, you need to use one of their handy tools: the Facebook Pixel.
Facebook Pixel can be installed on any website or app. It tracks customer behaviors on the website or app by memorizing which pages they visited and how they engaged on each page, one of those pages being the Order Confirmation page.
People only land on your Order Confirmation page if they just Purchased something from your site.
After you install the Facebook Pixel that page, you’ll unlock the ability to let Facebook know that you want online orders:
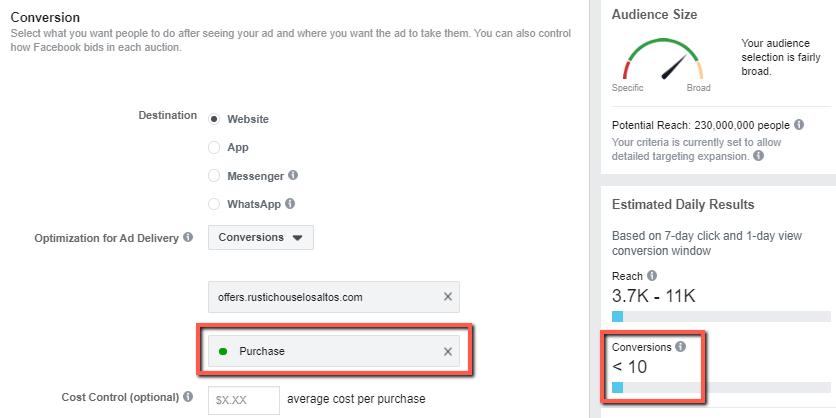
Also notice that when you set your objective as Purchases, Facebook also gives you an estimate of how many orders you will get based on your budget.
So to install the Facebook Pixel on that page, go to facebook.com/adsmanager.
How To Install Your Facebook Pixel On Your Website Correctly The First Time
When you are in Facebook’s Ad Manager, click on the hamburger menu on the top left of the screen and click on Events Manager.

Make sure your correct Facebook business profile is selected. Once you’re there, go ahead and create a new pixel.

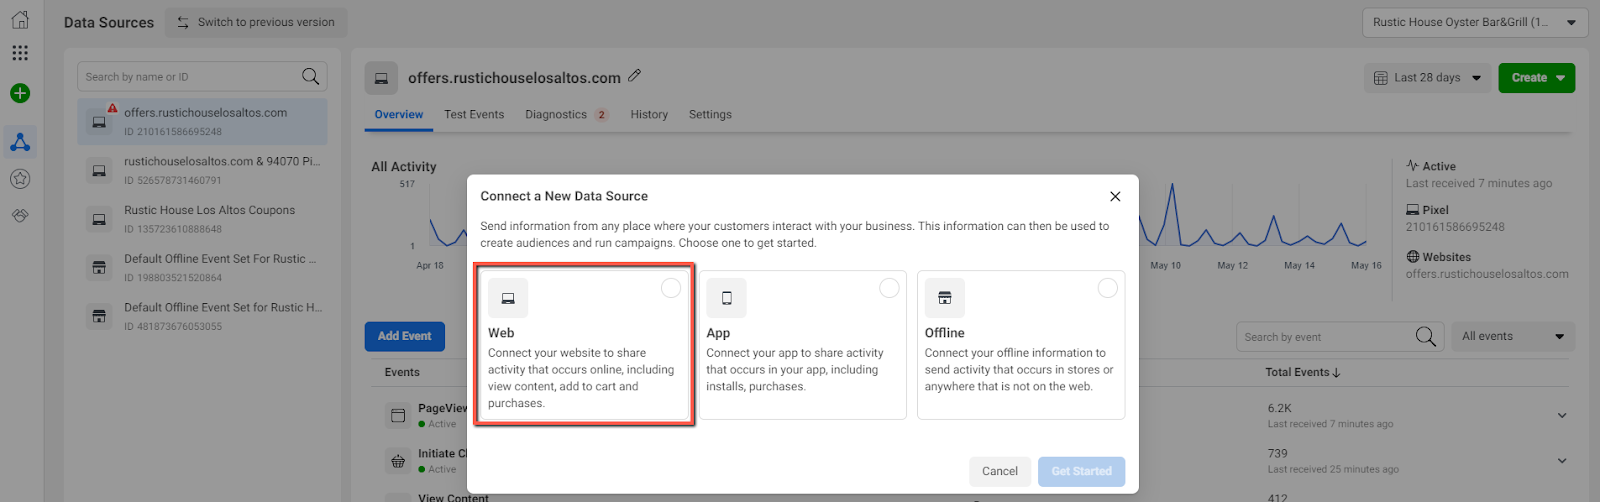
Then, select Web to let Facebook know that you will be tracking user activity on your website:
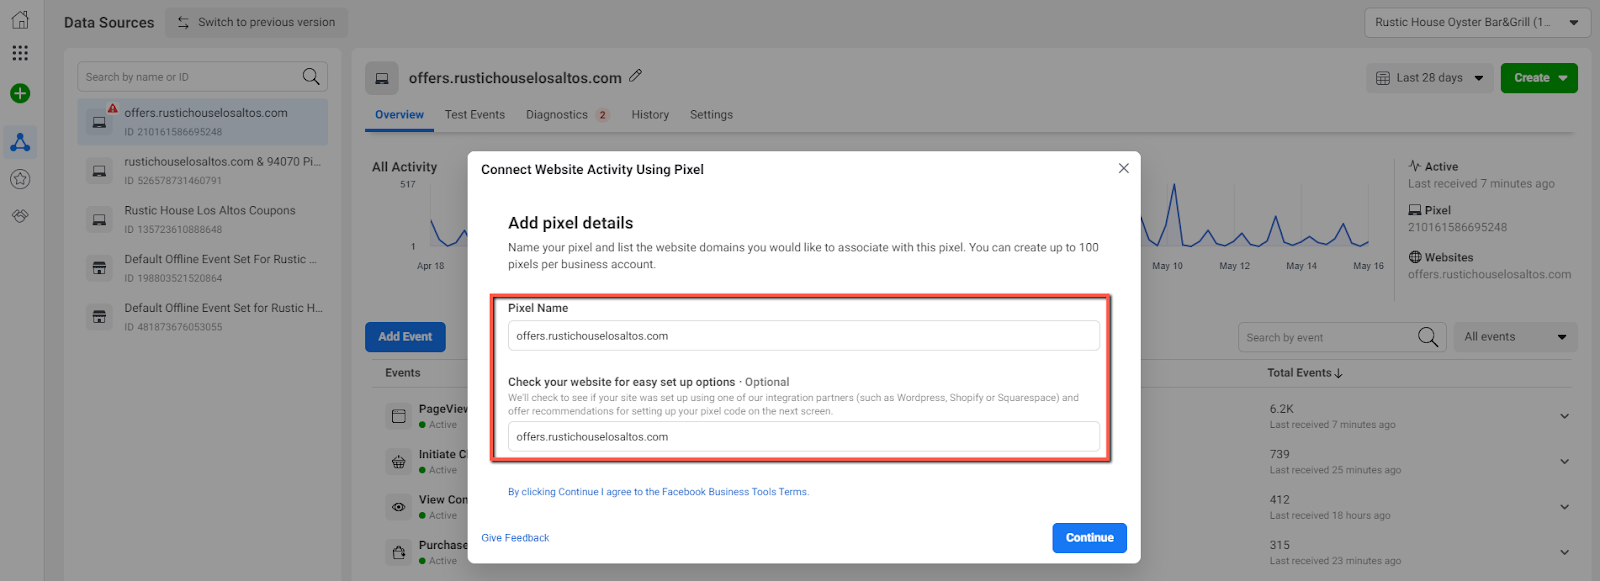
Now you can name your pixel. I like to name each of my pixels the exact URL of the property, so I would name this one offers.rustichouselosaltos.com so I know exactly which site it is.
It’s good to have this naming convention early on so you can differentiate between different pixels you have. In the future, you will probably have different pixels for every type of site or app you have (main website, gift card site, merchandise site, membership site, coupon site, etc.).
Once your pixel is created, you’ll have to install the pixel on your website.

Depending on what kind of ordering site you have, you can add the pixel manually or use a partner integration. Using a partner integration is easiest. The list of partners do this day show here:
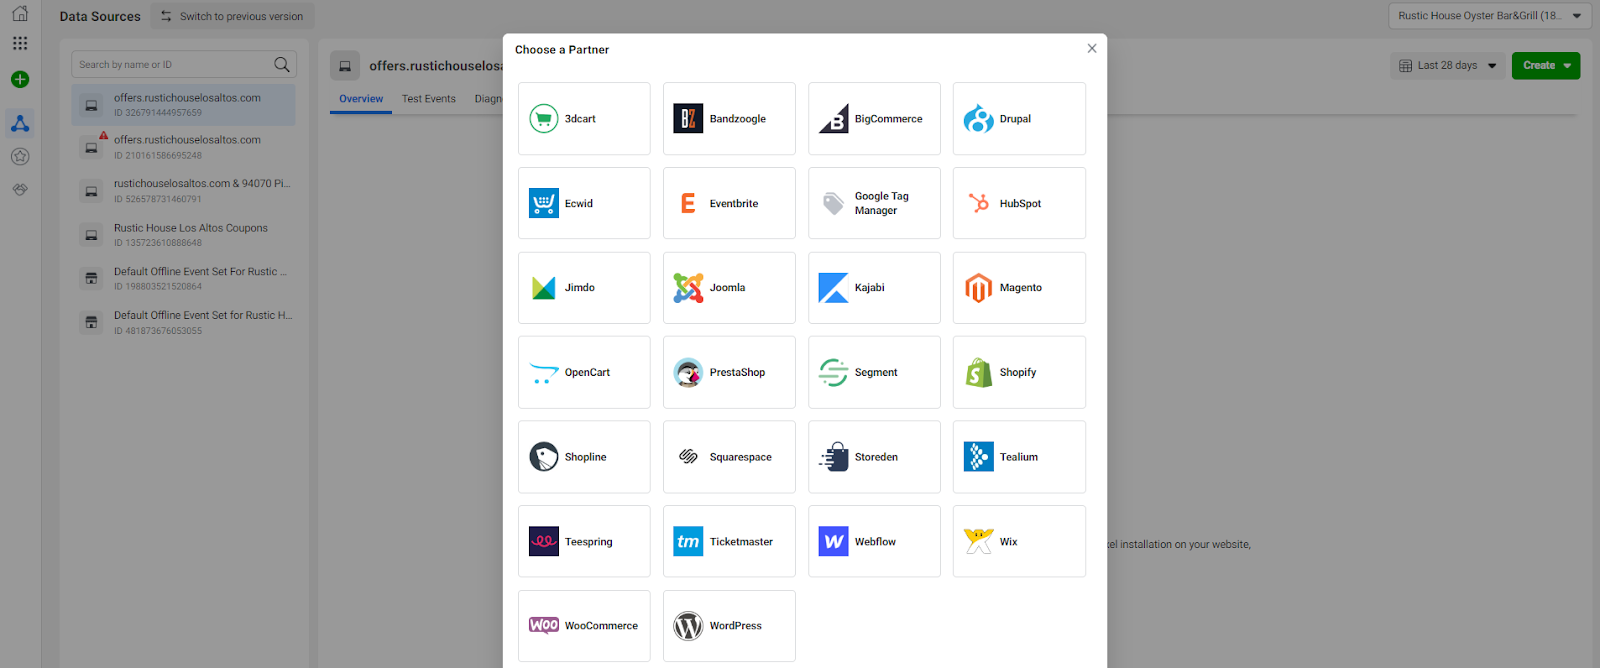
I use WordPress and WooCommerce for my restaurant online ordering sites, so I’m going to choose those. Whichever platform you use, you can choose that platform.
If you don’t use any of these platforms, it’s best to consult with your web developer. The question you should ask them is:
“How can I install the Facebook Pixel on my site so it tracks ecommerce metrics such as ‘Add To Cart’ ‘Initiate Checkout’ and ‘Purchase’?”
Moving forward with installing the pixel:
From here you’ll be following how I install the Facebook Pixel on WooCommerce. In case you use another platform, don’t worry, Facebook will give you specific step by step instructions for your specific platform just like what I am going to show you below:
Allow Advanced Matching. This gives you more data to work with. The more data you have, the better your ads will perform. The better your ads perform, the higher ROI you will achieve.
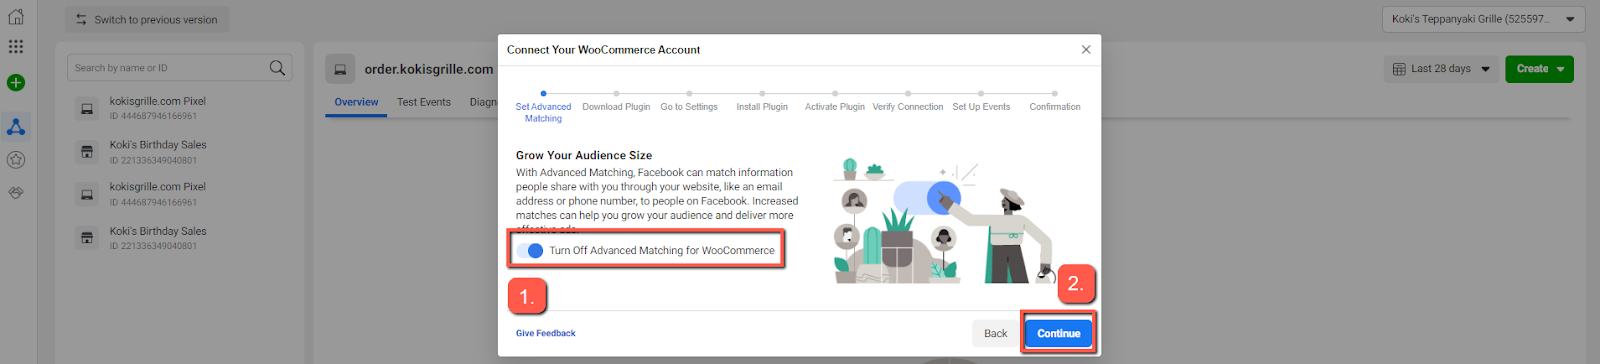
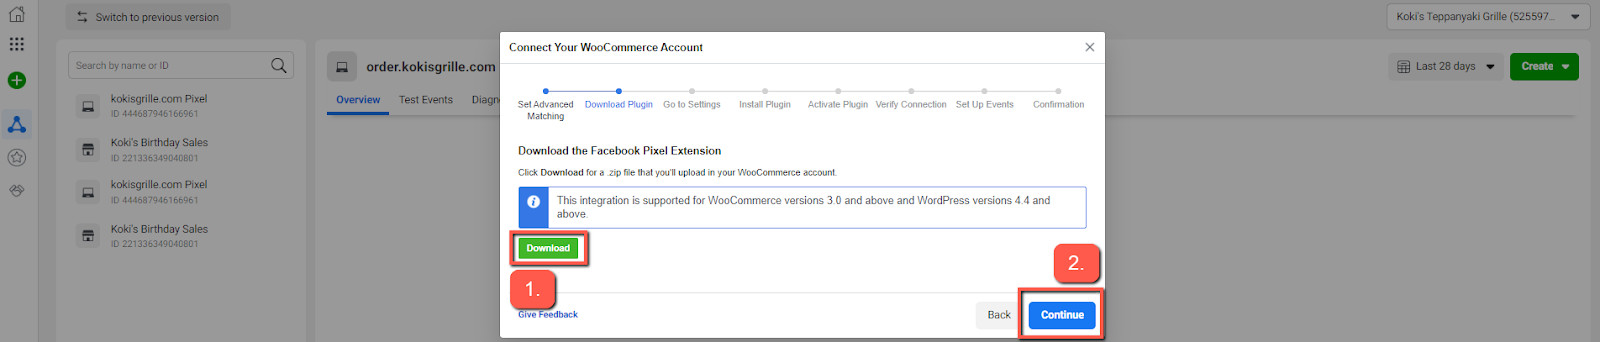
Download any files that they need you to download (make sure you remember which folder you downloaded the file in so you can upload it later). You will probably use this file to upload to your website so that Facebook can connect with it.
After following your partner integration instructions from Facebook, you will get to this page which will tell you if you connection with Facebook was successful:

Once you click on verify, you should see that your Inactive gray dot turns into an Active green dot:

If you don’t see this, go back and double check to see if you missed something.
Next, we’re going to check to see if the Purchase event is installed correctly.
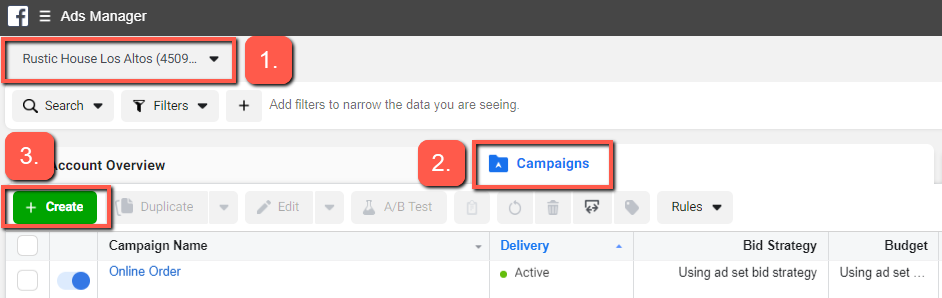
From here, go to you Ads Manager by clicking on the top left menu and then selecting Ads Manager:

Make sure you have the correct ad account selected. Then, when you’re in the Campaigns tab, click on the +Create button:
Facebook will prompt you to choose an objective for your ad. We just set up the Purchase event, which is linked to the Conversions objective, so we are going to choose that:
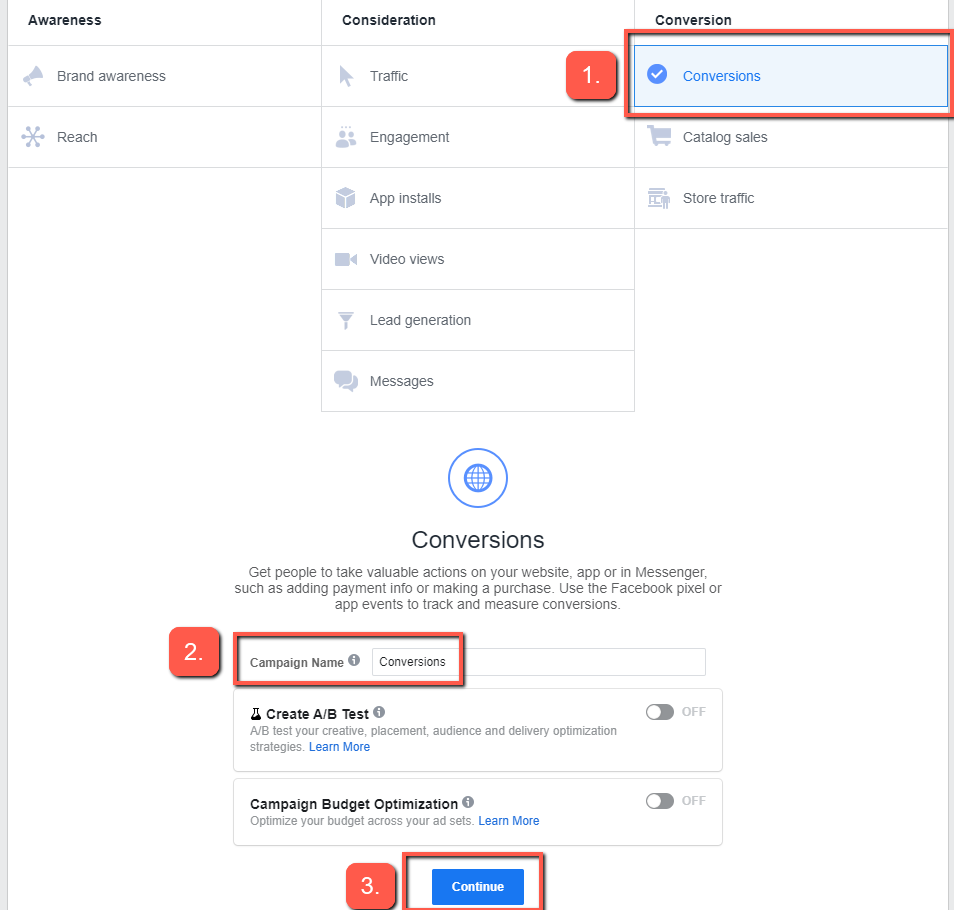
After you select Conversions, some fields will pop up near the bottom of the screen. Here, you can name your Campaign. I named my campaign “Online Order.” After you name your campaign, click Continue.
On this page, we are going to choose who we want to target for our ad. This is where we will see if the Purchase event was installed correctly on your website.
First, click on this “Select A Pixel” area to select your Facebook Pixel. If you followed my naming convention earlier, the name of your pixel should be the exact URL of your online ordering website.

Then, choose the event:
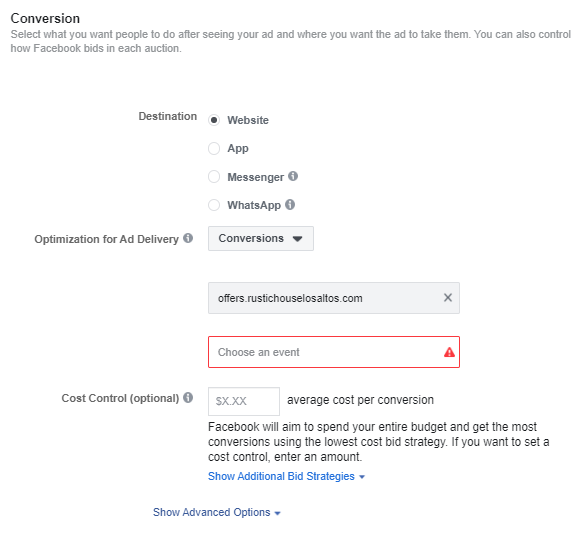
If you are able to select Purchase, then you installed your Pixel correctly and Facebook can now prioritize your ad to people who typically purchase online!

